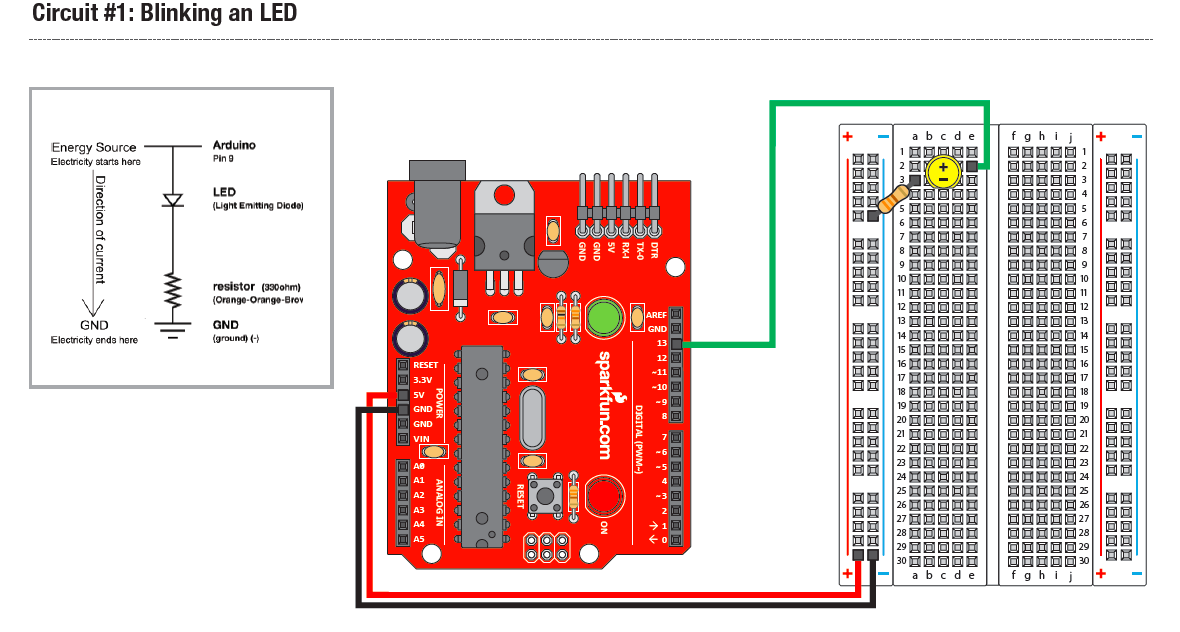
Blinking LEDs!
Creative Commons resources are open sourced under CC BY-SA 3.0
/*
Blink
Turns on an LED on for one second, then off for one second, repeatedly.
Most Arduinos have an on-board LED you can control. On the Uno and
Leonardo, it is attached to digital pin 13.
This example code is in the public domain.
modified 8 May 2014
by Scott Fitzgerald
*/
void setup() { // the setup function runs once when you press reset or power the board
pinMode(13, OUTPUT); // initialize digital pin 13 as an output.
}
void loop() { // the loop function runs over and over again forever
digitalWrite(13, HIGH); // turn the LED on (HIGH is the voltage level)
delay(1000); // wait for a second
digitalWrite(13, LOW); // turn the LED off by making the voltage LOW
delay(1000); // wait for a second
}
Challenges:
- Try changing the values of the delay function, and see how the blinking changes
- Intentionally create common syntax errors, such as:
- delete pinMode
- delete bracket
- extra bracket
- delete semicolon
- delete parantheses
- mis-spell function name such as digitalWrite
- delete pinMode
Creative Commons resources are open sourced under CC BY-SA 3.0
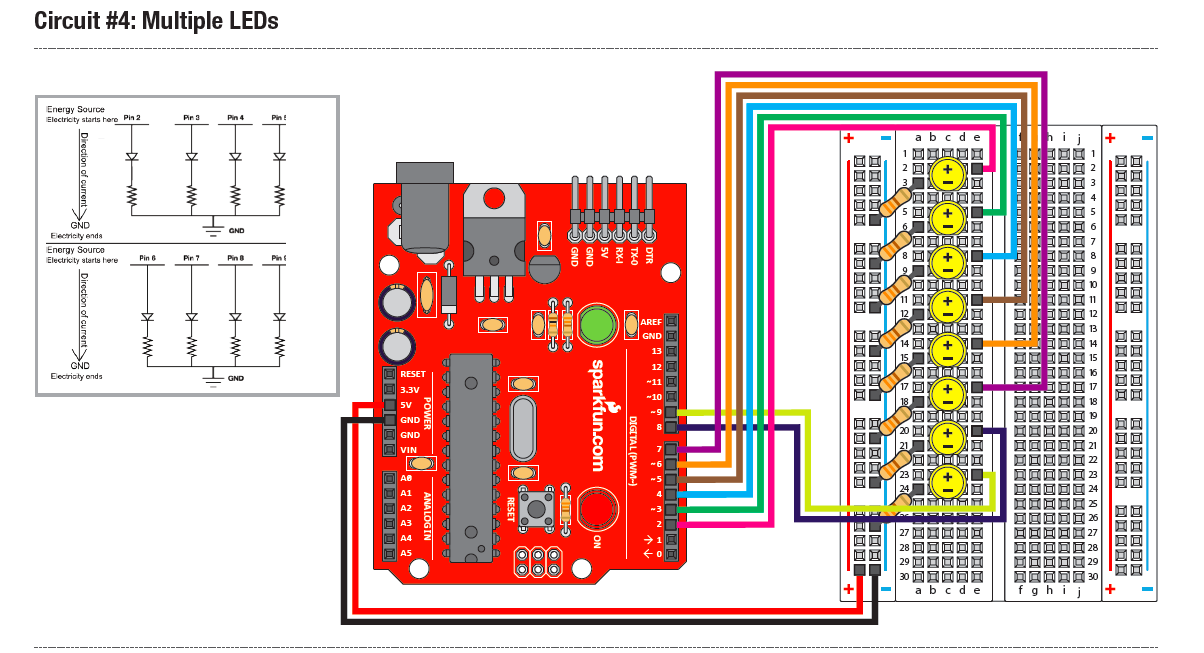
Challenge: Modify the above code to blink LEDs on at least 4 other pins in addition to Pin 13.
Terms to Understand:
- pinMode
- digitalWrite
- setup
- loop
- delay
- HIGH
- LOW
- OUTPUT
